My K8 Prophecy clubs have reached the end of their tether. After 8 years of use! First of all, many thanks to K8Malabares for their excellent equipment. Most smartphones won’t last that long (except for my Samsung Galaxy S2, which still works). If you need juggling equipment you can’t go wrong with K8. I have some of their non-LED equipment as well and it’s just as good.
Upgrade
About six years ago I did an experiment – to see if I could emulate the K8 IR code on an Attiny85 chip. I knew they used that chip, or possibly the Attiny45, because one of my clubs was faulty and I opened it up to have a look – K8 sent a replacement, by the way, talk about great customer service!
Now that my balls and clubs are not working anymore, due to the battery reaching end of life, it’s the perfect time to test out my new code. Luckily K8 didn’t solder their chips, instead opting for a convenient chip socket for easy replacement! I made some updates to the code, adding new functionality and colours. (K8 have also done an update since I bought my equipment) The most important, for me, was adding a timeline record and playback. This means that I can record the timed colour changes for my entire show into the chip via IR remote, and play it back (in time with the music) by pressing a single button. This is similar to how Aerotech Ultimates used to work.
You can check out the code for Attiny85 here.
Batteries
The batteries were the main thing. K8 use lithium batteries with 250mah power. I found some batteries online with a capacity of 600mah which I thought I could make fit (see below for details – not quite, but I made it work). I also bought a cool new charger for the new batteries.
The procedure
For anyone who wants to try and do this, I am posting some tips and photo’s.
1. Taking apart the club
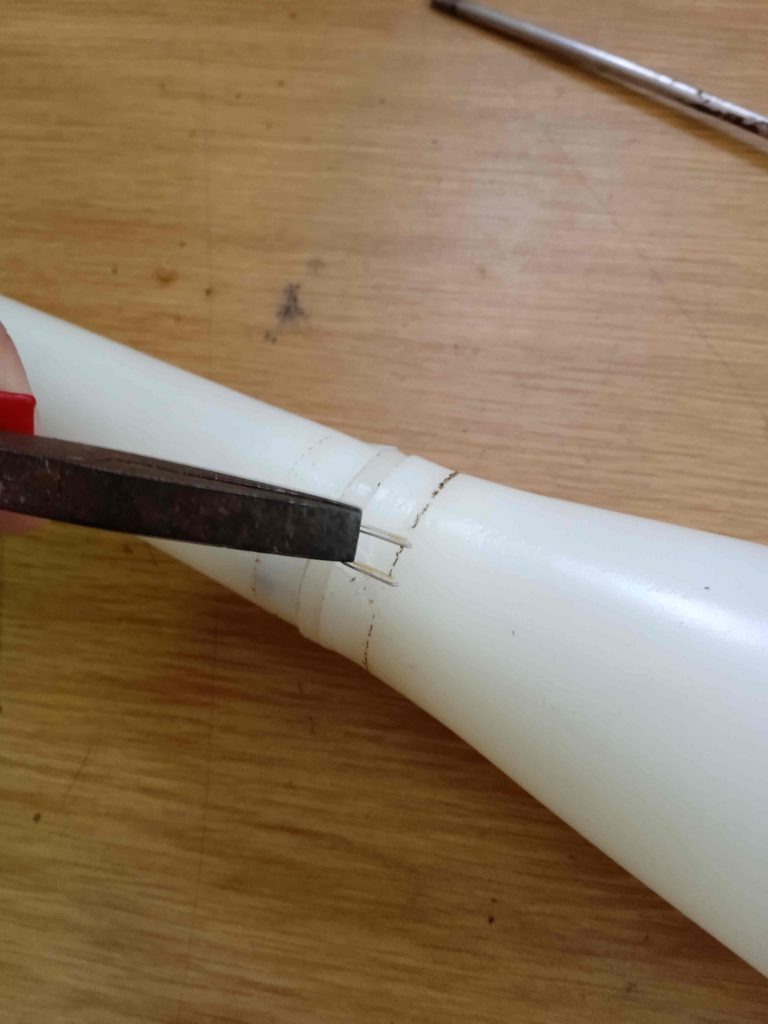
Pull off the tape from the center, then pull out the staples:
Take off the knob and top bumper:
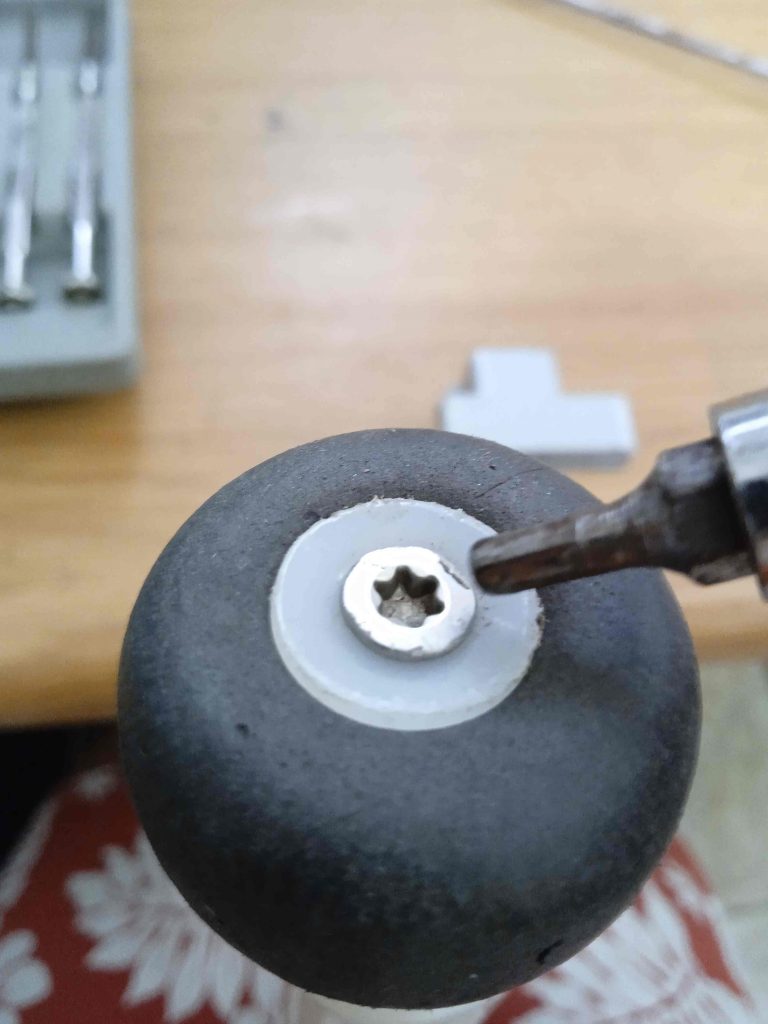
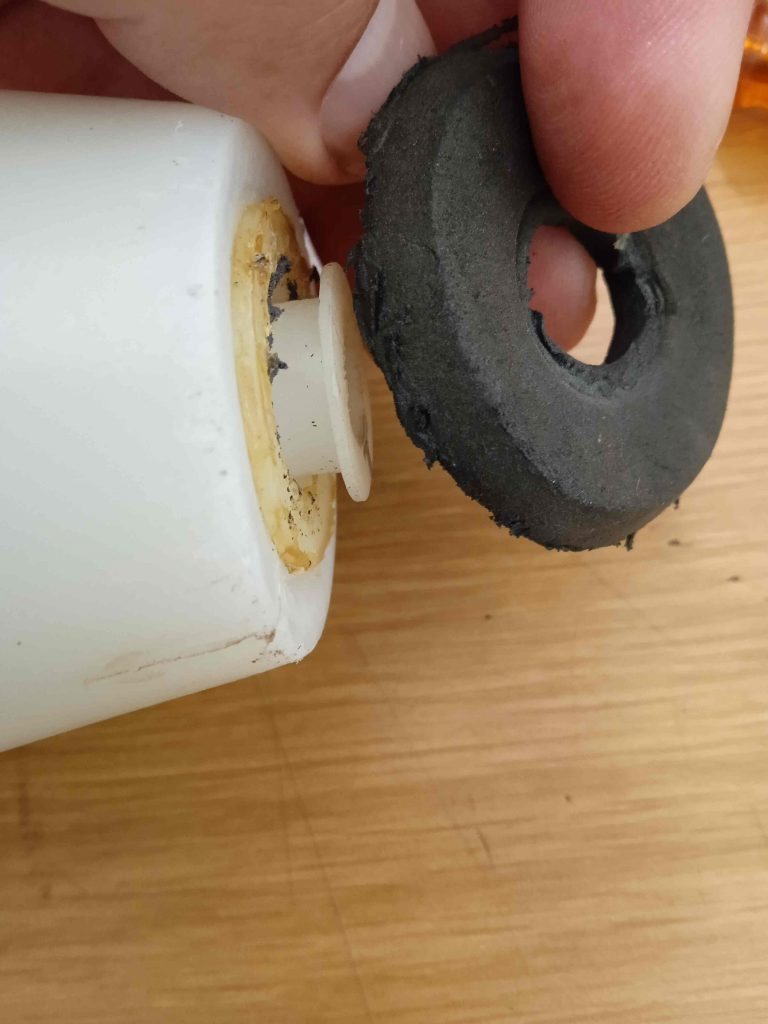
Pull off the plastic around the handle, then unscrew the plastic spacer (needs an allen key)
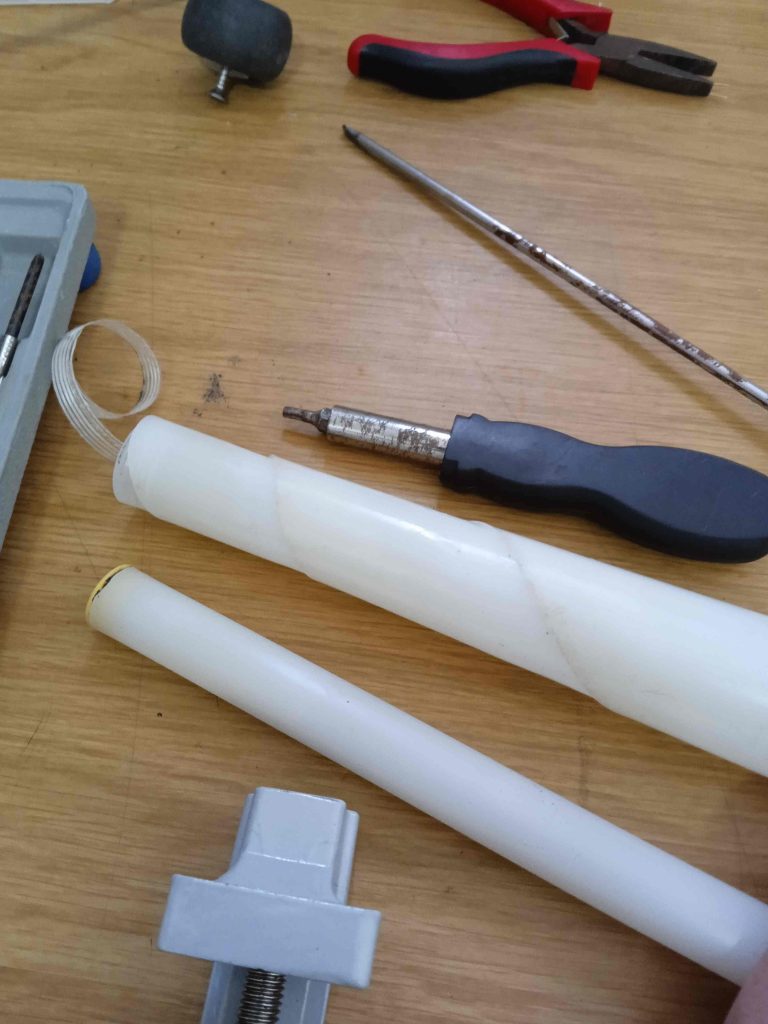
The next part is really sensitive – make holes in the top of the bulb cover to let the inside pipe come out. Get it out by pushing from the bottom – I also shoved a dowel inside and pushed upwards. If you use too much force this plastic pipe could bend, so be careful.
Now pull out some more screws holding the thicker top piece of the inside pipe on, and pull the spacer out to let the electronics out.
The bottom thin pipe should come off easily, leaving the bare circuit board.
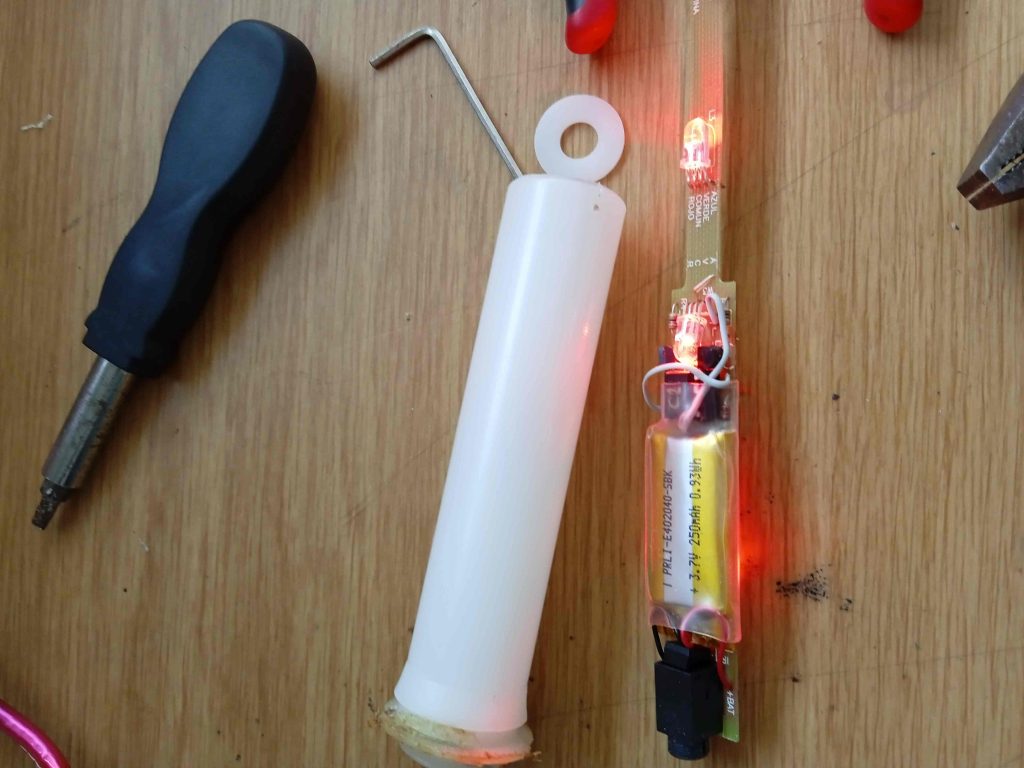
Now cut off the insulating cover, exposing the battery. See how fat it is!
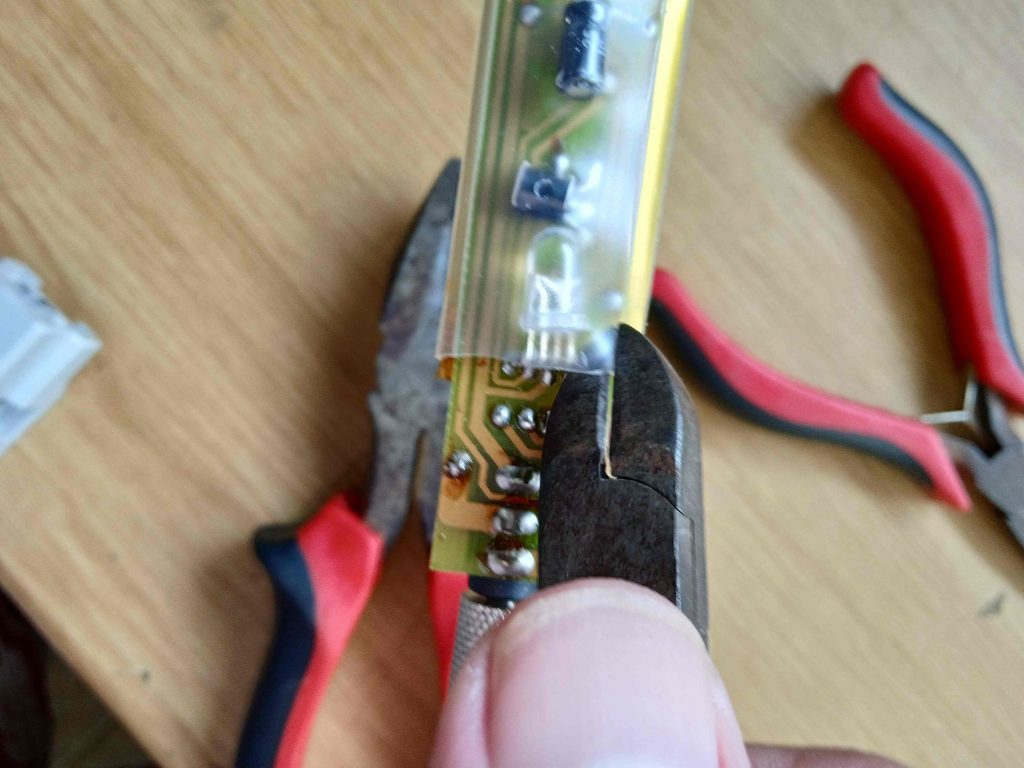
Pull the battery away from the board (carefully) and cut the two wires as close as possible to the battery – we need those!
The new battery ready for placement. Also, my newly programmed chip in place (old one from K8 labelled C2.
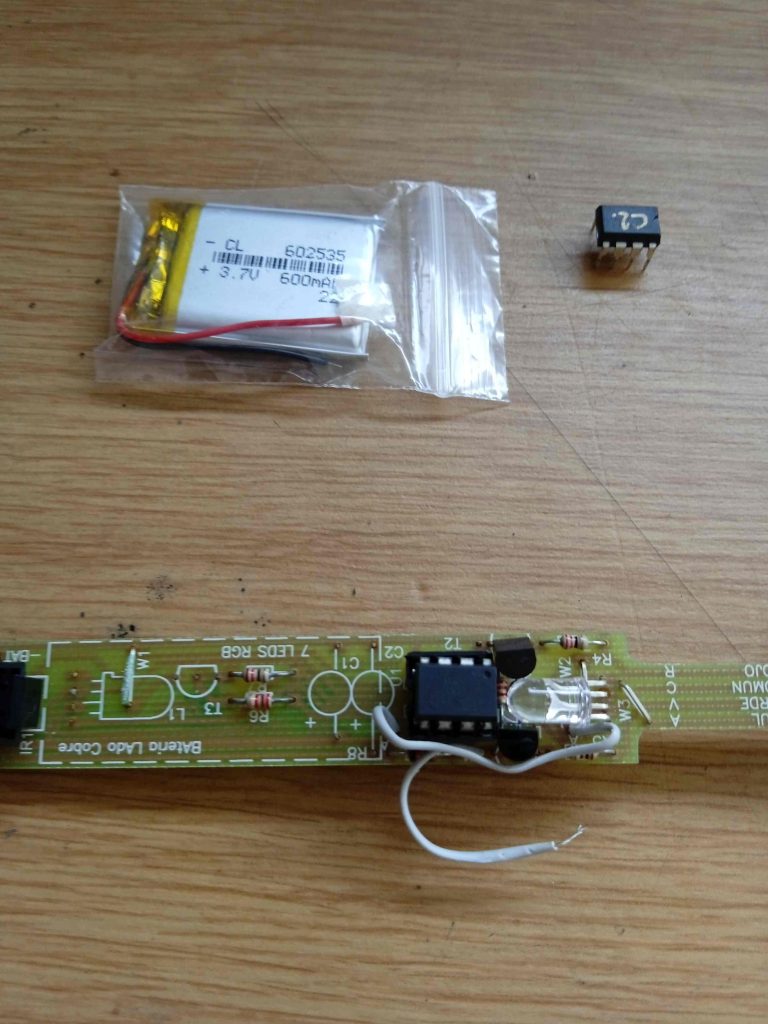
Now comes the hard part. Making space for the new battery. I had to cut into the larger diameter tube on both sides so that this could fit. I actually bought a Dremel to do this job.
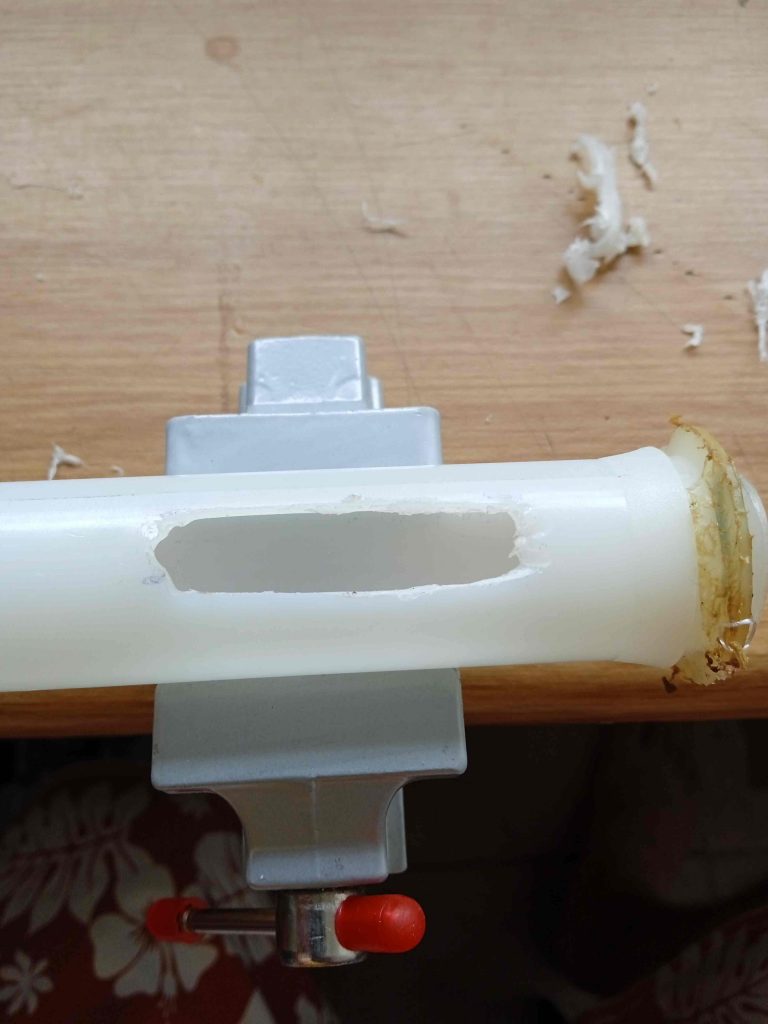
Now put the circuit back into the top pipe, and find the battery wires. Then solder the battery on – finishing with insulation. The battery should fit with only a little bit sticking out on both sides of the pipe.
I used clear tape to stick the battery in – it was already pretty snug as the holes were just right.
Putting it back together
Just like taking it apart, only in reverse (and much easier)
Put the longer circuit cover tube back in and line up the holes (with the spacer), then put the screws back in. This works fine with just pliers, just twist left and right for these, while pushing in firmly:
Now the inside tube goes back into the top of the bulb – it just snaps in easily (how hard was that to take out, though, whoah!)
After putting the top bumper back, the middle spacer goes on. I forgot to mention, that doesn’t come off without removing a plastic screw cover (yellow, bottom of thin tube) so keep that in mind if you haven’t taken this apart yet.
Finally it’s time for the wrapped plastic handle – I didn’t put the staples back, you are welcome to try and do that..
Add some tape to keep everything together, screw on the knob and your club is “as-new” again.
Just a quick tip, I noticed that there is a bit of wear where the circuit goes from thin to thick (you will see what I mean – the long bit with all of the LED’s. Some of my clubs had non-working colours due to this, and I had to bridge the gaps with wires.
Let me know if you have K8 clubs and are interested in upgrading yours, I am happy to answer any questions.
