Speech to Text is finally ready – Whisper review.

Many years ago I developed and published an Android app called “Made Up Stories” which I used to record the bedtime stories I told to my young son. Many of the stories were sanitized versions of movies and novels, but I also had a lot of fun creating my own characters and plots on the fly. Years later, I have a collection of over 300 stories saved, and I started to think that it would be nice to turn some of the original ones into illustrated children’s books – but the time it would take to transcribe these audio files was daunting. I am a reasonably fast typist, but not quite up to the speed of spoken word.

Transcription software

In 2019/2020 I decided to try out transcription software, so I fed a sample audio file into Mozilla Deep Speech and Google Speech to Text, among others. Unfortunately, due to my South African accent, none of the transcribers I tried had any accuracy, and I shelved the idea. Literally every second word was incorrect. Also, Deep Speech required a very specific audio sample rate, and Google Speech to text isn’t free (I had a free trial). *they may have improved by now, I didn’t check.

Discovering Whisper

Last week I saw an article on The Verge, which was singing the praises of “Whisper“, the new open source transcription engine. It was incredibly easy to set up, and best of all, ran entirely on my laptop, for free. After installation it is a simple one-liner on the command line to get your audio file into text format. Best of all, the thing is really accurate – I read in their paper that the model was trained on a more diverse range of speech, and uses a different approach to others. Well, for me at least, it works!

There is still a lot to do with the transcriptions, which come out as one long line of text – with barely any punctuation.. And don’t get me wrong, there are still some errors (admittedly I was using the “tiny” model – only 350mb, the “Large” model is apparently even more accurate but takes up 5-6GB of space.)

Finishing touches

Well, I have cleaned up the first story, “Pinky the Amazon river dolphin visits the Mesozoic”. My wife is an amazing artist, and has agreed to illustrate, but I wonder, could AI help with that as well?

Dinosaurs on an ancient river bank – Craiyon generator
Underwater cave – Stable Diffusion

Maybe not.. (The dolphin images that I have managed to generate so far have only succeeded in making me feel ill.) I have signed up for “Midjourney” (which is DOWN at the time of writing). Apparently it is the best of the bunch – so who knows, maybe I can automate some backgrounds to save time illustrating the stories.

*Update: I signed up for DALL-E 2.

DALL-E 2 “Dinosaurs on an ancient river bank”
DALL-E 2 “Underwater cave scene”

I’m definitely going to do a more in-depth comparison of all of these image generators in future!

Upgrading K8 IR RGB Clubs

I love K8. Their reasonably priced LED equipment is the basis for my favourite solo juggling act, the “Electric Glow Juggling Show”. I bought my K8 clubs over 7 years ago, and last month they finally died.

Emergency!

Since the pandemic finished (or at least since we all learned to live with it) I have never been busier. People want to book my shows. Luckily, a friend has some working K8’s I can borrow for now, but long term I need to sort this out. I’m not changing manufacturer so the choice is to either purchase a new set or fix the ones I have. The pandemic also had the effect of limiting my finances for the past two years, so new purchases are on hold for now – so I opened up my K8’s to see what can be done.

Inside the K8 clubs and balls

First impression: these things are well put together. It took me the better part of an hour to get the electronics out without destroying the club in the process. I found the problem: a really fat lithium battery, completely finished.

Then I found something really interesting. The actual circuit is pretty straightforward and is running on a replaceable Attiny chip. So a few years ago I made some code for Arduino which was an attempt to emulate the K8 IR RGB internal workings. With a few adjustments this old code actually works inside of my favourite clubs – it was as simple as matching the alignment and dropping in my own chip. Thank you K8 for not soldering your chips on, and using a header instead!

The plan

First priority is to get the replacement batteries – I ordered these ones on Amazon: the same size as the original but bigger (>2x) capacity. Should be great if they work!

In the meantime I am working on the code, with upgrades such as variable strobe (like Aerotech equipment), and timed record and playback of settings for my show*.

*I understand that K8 have implemented a method of record and playback functionality in their latest equipment, as well as more new settings – if you need LED equipment I highly recommend going there and getting some. Also, their customer service is brilliant. https://k8malabares.com/

Here is a sneak preview of a new setting running on the bare circuit – Red/Blue with variable strobe!

If anyone is interested, the code is up on Github here – most of it is from many years ago and not very good, but I am working on it, need to have everything working without bugs by the time I receive the batteries. After I upgrade I don’t want to have to open the clubs again! When I get everything working I will do an “instructables” style tutorial – even if you aren’t interested in the firmware upgrade, the battery replacement is worth doing to extend the life of this amazing equipment. By the way, one of my K8 balls stopped working ages ago – I just opened it up and the battery is replaceable too!!

K8 Virtual Juggling with working remote

K8 are my favourite type of LED juggling equipment. Recently I updated my virtual juggling web app to include a working remote control – just like the real thing.

The App

So the app consists of an animated juggler, a remote control and “Change your pattern” button.

While the juggler is juggling, you can press buttons on the remote to change the juggling ball colours (accurately emulating the actual K8 equipment settings)

The “Change your pattern” menu is a large list of different juggling patterns, which when selected will change the animation displayed.

How it works: back end

The back end is based on Flask. I am using the beautiful soup library to fetch the menu of juggling patterns from the awesome library of juggling website. Once selected, the gif of the pattern is fetched. It is then processed (a script inverts the colours and makes the juggling balls transparent) – if that hasn’t already been done for the particular pattern.

How it works: front end

The juggling animation and remote control are written with P5.js. The juggling ball colours are implemented as a background which shows through the transparent balls. The button co-ordinates are relative, so work on any size screen (looks best on Desktop)

Magic Poi 2022 update

Current state of Magic Poi – and some ideas for the future.

First of all, an announcement: Magic Poi is now available for ESP32, as well as ESP8266 architecture. This will bring improvements in performance. I plan on continuing support for both, and in the near future a combined code base will be provided.

I am going to list current features here, and improvements I plan to implement.

On-board images:

  • I have partnered with EnterAction, an awesome Sydney based fabrication company who are taking over the hardware development from now on. Improvements will include an SD card add-on for limitless on-board storage. This will require changes to the code, as currently the maximum is 52 images supported.

UDP streaming:

  • this is a defining feature of Magic Poi. The images are generated off-device, and “streamed” via UDP pixel by pixel. I plan to keep improving this functionality but change it to not be the default mode. Due to WiFi interference the UDP stream is sometimes interrupted, making the LED’s stutter, so work is being done to mitigate that.

“Timeline” – images changing in time to music:

  • currently there is a desktop app to generate the timeline (and associated images) and save as a zip file, which needs to be uploaded to the Android app in order to be “streamed” to the poi. I plan on changing this functionality to rather happen in the poi code, thus avoiding the WiFi interference problem. The timeline editor will be made into a web app, with the option to download directly to the poi.

Station mode:

  • poi connected to a router provides more stable WiFi than the current AP mode. I have made a start on providing a way to use this mode.

Online account:

  • like a PlayStation or Kindle, there is a benefit to having a cloud aspect to any product that consumes media. The Magic Poi website is going to be a place where you can upload and share images and timelines, as well as interact with other poi owners. All uploaded images will be private of course, unless shared. I have made a start on this cloud aspect, with an option in testing to download images directly from your cloud account to the poi. The ultimate goal is to be able to sync any two pairs of poi with two clicks!

Android app:

  • Still not working: text to image (stream words directly to the poi).
  • Once the online portal is finished, this will be added to the app, so shared images and timelines can be viewed without need for a web browser.

The above is a small part of the list – thanks to EnterAction taking over the hardware development side, I will have more time to devote to the software improvements. We also plan on adding a battery level indicator, and a higher power battery for more play time.

Thanks for reading!

Keep an eye on this blog, and sign up to the newsletter (if you haven’t already) for more updates as Magic Poi moves forward towards it’s inevitable crowd funder launch!

UPDATES:

Sign up for our update alerts:

Unpacking an inverted index with Python

Lately I have been doing a lot of data processing in my job for UCL. I recently came across a problem which didn’t have a ready made solution, so here is my take on it.

Inverted Index

An inverted index is simply a list of all the unique words in a document, labeled by their position. Something like {‘Hello’: [1], ‘world.’: [2]}. Except that they are rarely in order and there can be multiple instances of any given word in a document.

I was given the task of ‘unpacking’ one of these (actually thousands, but if you can do one..). The inverted index came in the form of a dictionary of words and their positions, returned from an api call. Since I couldn’t find a ready made solution, here is my take on it, in Python 3.

The solution

You can try it out with the included example. I hope this helps someone with a similar problem to solve – do let me know in the comments if you have a different solution.

I made an LED indicator for my portfolio site

Job hunting is tough – I’m busy until February 2022 but already feeling anxious about finding the next gig. That’s why I wanted to give myself a bit of an incentive – a visible indicator of success. I decided that whenever someone visits my portfolio site, I wanted an LED to light up. Read on to find out how I did it (using Flask, http requests, and an ESP8266)

Self Hosting

I recently had a bad experience with an online service shutting down on me – had a bit of a rant about it, although in the end it wasn’t too serious – but I am now determined to do self-hosting wherever possible *disclaimer: my current work project is hosted on Google Cloud, and I’m using Firebase and push services for some Android apps also.

The Flask api

The first step was to create a simple Flask api to facilitate tracking of site visits. This is based on this minimal flask api template on GitHub. I used a simple global variable to keep track of website visits because I’m doing this in my spare time and because it works fine – and I love boolean switches. Here is how it works in one simple gif:

Think of the hand as a visitor to my site, and the “switcher offer” is the ESP8266 at my home checking the api (the switch)

HTTP request from resume site

Since I am learning React my portfolio site was a good way to have another look at the framework. I used this single-page React resume site template as a base, adding my own details and an http request to the Flask api endpoint on load.

ESP8266 code

I used the basic http requests example with my own api details, and added in EEPROM code to record the incrementing number of visitors to persistent memory. The ESP8266 module checks once per second with the api whether there has been a new visitor to my site. If there has, the built in LED on my D1 Mini switches on. Although I have mostly moved over to using PlatformIO, for this very simple sketch I used the Arduino IDE.

Deployment

Like I said, this one is self-hosted. I’m using Digital Ocean droplets, which are a fixed cost of 5 dollars per month, for as many sites and services you can cram on there (trust me, it’s a lot). The React site was surprisingly simple to deploy, just build, copy the build folder and point Nginx at it. Flask is a little bit more complicated, compared to how easy it would be on Google Cloud, for example, but a few config files are really not too much to handle.

The result

Whenever someone visits my website, the LED lights up. Simple as that. And I can plug in and check how many visitors I have had. I’m hoping that one of those visitors will like what I do enough to hire me next year!

Visit my site https://devsoft.co.za to light up my visitor tracking LED.

Potential improvements

If I was making this into a product, I would certainly upgrade the Flask API to include a database to keep track of the number of visits, rather than doing this on the ESP8266 EEPROM – which maxes out at 255!* Obviously this could include a web interface for accessing the information, I could log the times… But most of this tracking stuff has been done already – analytics for websites. Perhaps the ESP8266 could pick up some of this information and display it on an LCD screen. A flask service for accessing Google Analytics from Arduino perhaps? Let me know if this is something you are interested in!

Also, proper authentication – if this wasn’t just for myself… JWT, rate limiting, CRUD endpoints and a web interface to change LED behaviour.

And maybe an RGB LED would be nice, then I could add in some of my other websites, in different colours!

*apparently the Arduino EEPROM library works differently on ESP8266 – ignore that part of the code, I need to update it (the counter still increments while the module is plugged in, though)

Goodbye Fritz.ai, goodbye proprietary online services

Fritz.ai “sunsetting services”:

Fritz.ai is (was) a cool service for, in particular, making machine learning apps easily. The marketing hype was slick, and they roped in a lot of developers to help them push their service to many devs, particularly in the Android space, with paid articles on medium, and on their website.

First of all, I have to say, I take full responsibility for this, and I don’t blame anyone at Fritz.ai for my problems, it’s their service, they can do what they want – but I wasted a lot of time learning how to use their api, publishing my own (unpaid, no affiliation) posts about the service, and using it in apps published to the play store. Their business model seemed clear – free to use but once you reach a threshold you have to pay for the service. Seems legit, probably was legit.

My Android apps didn’t take off, so I never reached that threshold, never ended up paying for anything at all – but I did waste a lot of time making apps using a service which is getting switched off at the end of the month (August 2021). In other words, my apps are going to be switched off, for the (very) few users who did install them. If I want to continue with these apps, they will need a substantial re-write. In many ways I’m lucky that the apps were not successful!

So I have learned a valuable lesson here:

The lesson is: don’t trust your work to “flashy” or “new” products and services. I could have spent a week back then just learning the ins and outs of tensorflow on android, and done it myself. Just because I’m lazy doesn’t mean I’m stupid. Lesson learned.

*here is the full unedited email for those who are interested – I still don’t see any mention of this on their site or blog:

We’re Sunsetting Fritz AI


Service will end August 30, 2021


Hello,

This email is to let you know that we will be sunsetting the Fritz AI mobile machine learning platform, effective August 30, 2021.

What does this mean for my account?

As always, any custom trained models, datasets and annotations are exportable. Please see this documentation for how to export datasets and models.

After the sunsetting date, access to the Fritz AI SDK, webapp, API, and hosted services will be discontinued. All models, datasets, and resources stored in Fritz AI will be removed.

For mobile apps, the Fritz SDK will lose API connectivity, but on-device model inference should continue to function. Regardless, we advise you to update your apps, removing the Fritz SDK and models.

Snapchat lenses do not depend on the Fritz SDK nor API, and lenses should continue to function as before.

Why are we doing this?

Fritz AI’s mission has been to make the power of machine learning solutions available to mobile developers. When we started in 2017 there were few options available. In the following years there have been many great entries to the market such as ML Kit, Create ML, MediaPipe, Lobe.ai, MakeML, Firebase ML, and more. Now there is a mature ecosystem of tools, including free and open source options.

We understand that this decision will have significant consequences for our community, but we truly believe the wide range of incredible tools and resources out there will empower you to continue on without Fritz AI.


Sincerely,

Dan & Jameson
Founders, Fritz AI

The magic of open source

Recently I found an awesome Android retro-gaming app – Super Retro Mega Wars, available on F-Droid. I was excited to introduce my son to the fun of Asteroids, Tetris, Snake and Tower Defense. Unfortunately the difficulty level was beyond a 7-year-olds’ abilities, and he soon lost interest.

All of the apps on F-Droid are open source, though, and I am an Android developer. Let’s see what I can do, I thought.

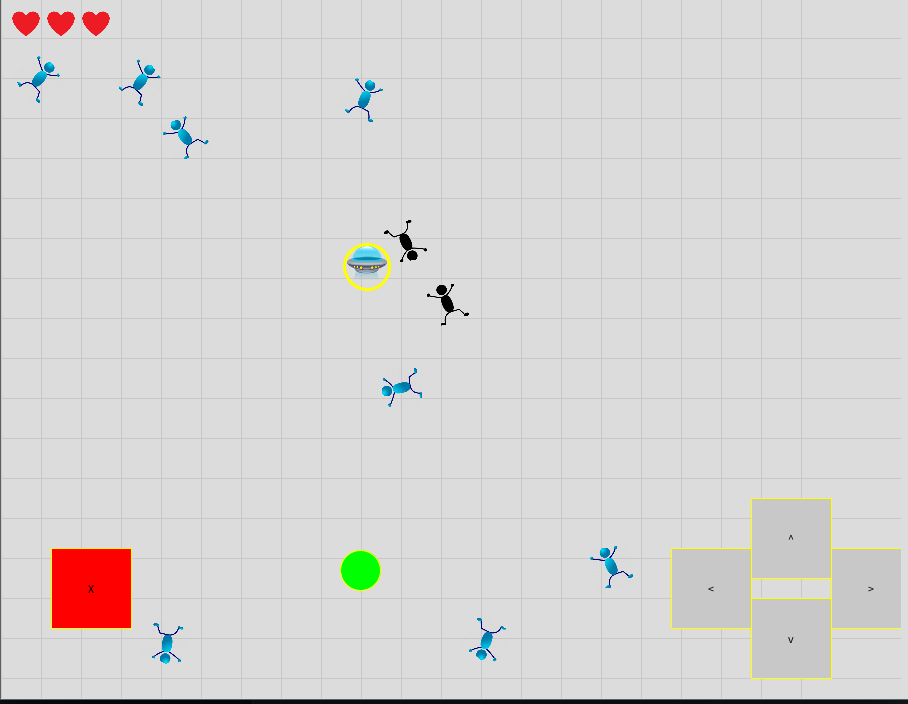
A few minutes later: I am pleased to present a kid friendly version of “Super Retro Mega Wars”, you can check it out here – Retro Wars Kid Friendly Version.

Changes include:

  • Asteroids: instead of blowing up, the space ship destroys asteroids it touches
  • Tetris: blocks and lines only
  • Snake: slowed down to a manageable speed
  • Tower Defense: more missiles and bigger explosions

All of this took me a total of around 10 minutes to set up, despite the app being coded in Kotlin (I am still transitioning from Java). Mainly this is due to the very clear way that the code is presented by the author – thank you @pserwylo, my son loves your game.

This brings me to the point of this article. Open source is amazing. It gives joy and empowerment to people from around the globe. There are loads of important projects out there that have a huge impact by being freely available and editable. Even a simple game app can make a difference – I know the source of this one is going to help me become a better developer.

I only wish the same could be said for vaccines. Imagine a world where we could say that scientists gave away their recipes with the hope that others could use and build on their work*.

*I am aware that many do, just none that I am aware of who are involved in producing the current commercially available Covid-19 vaccines.**

**Thought provoking further reading: https://jacobinmag.com/2021/02/finland-vaccine-covid-patent-ip/ – I have no affiliation, just an interesting article about a failed attempt at making an open source Covid-19 vaccine in Finland.

Why you should hire a juggler (Or the similarities between learning to juggle and learning to code)

Learning new juggling moves is a task that benefits from breaking down into smaller, more achievable goals. In this respect it is very similar to learning a new coding language or framework.

Take my favorite 3 ball juggling move, for example: the Box.

In order to learn this we need to work out what is going on. There are three separate throws, two going up (one in each hand) and one going across.

Steps to learn the box:

1. One ball, up, across, up again

2. The hard part on both sides, with two balls (simultaneous up and side throw, not very intuitive but once you have it, it feels great)

3. Go for it. if you spent enough time on step 2, you can do it!

By the way, the example above is from https://libraryofjuggling.com/

Similarly in programming we have to break tasks down into pieces, only putting them together at the end. Recently I got a new job building an online app using Flask, JavaScript and a little bit of JQuery, Jinja and something called “Tabulator” for web tables (and Bootstrap for buttons).

Learning

Previously I had only worked in Android (Java) and Arduino (C++), so at least the syntax made sense on the front end, but in order to get the basics down I started by going through the FreeCodeCamp examples. Once I knew how to call a function, parse an array, set up a library and so on it was time to move on to the next step – building a basic program which works.

Finally I gained enough understanding of the inner workings that I was able to add/remove features without being afraid of breaking things and could start to enjoy building something.

Deploying

In Juggling, I learned that being able to keep up the pattern without dropping is only part of the process. As soon as I wanted to show off my new moves I was faced with another set of problems to solve. After some more practice, I learned that every juggling routine needs a flashy start and finish (to get people’s attention). It’s also important to be able to juggle without looking at the pattern, while talking at the same time.

In the software world this is called deployment. Personally I like going with my own Ubuntu based server (hosted by Digital Ocean ) but there are many options out there, each with their own different requirements to learn. The new job I mentioned is hosted on Google Cloud.

Conclusion

Conclusion and take away message: practice is always an important part of learning anything, but the basics need to be covered at first and you should definitely hire a juggler.

Check out my CV! (soon to include Python, Flask, JavaScript, Jinja, Google Cloud Services, and more)

Creating an app for Android Gingerbread in 2020

Whatsapp has officially revoked support, Google says 0.2% of devices accessing Google Play are still running it. I explore the difficulty in targeting a 10-year old version of Android.

Step 1: Search the internet

Maybe I’m using the wrong search terms but this is a bit of a bust. Google likes to showcase new shiny things. My search did come up with the above information regarding Whatsapp and also Google removing support (if you want to target the Play Store) but how do I do this for just my phone?

Step 2: Just go for it

I am using Android Studio. What if I just choose Gingerbread in the settings from a new project? Will it work?

Ok, it turns out that I only have lowest Android 4.0 (Ice Cream Sandwich)
I need 2.3.3 (Gingerbread)

Let’s check the SDK settings in Android Studio – I am sure I installed all the correct target libraries years ago, what is the problem?

SDK tools says Gingerbread is installed. Google says no!

Step 3: What happens if I plug the phone in?

Android Studio and ADB recognise the device. API level is 10. OK in my new project I go to build.gradle (why are there two, couldn’t they just call the one you need to edit something else?) and change API level to 10 (target, min, compile) – now what? Wait some hours while Gradle does it’s magic. I’m waiting for my laptop to be depreciated by Android Studio to be honest, it’s such a resource hog! (pro tip, if your laptop is running too hot, check out cpulimit on the command line. Or just get a job and buy a new one..)

This is turning out almost as bad as React Native, which I had a look at the other night – 1 hour to get to a “Hello World” app to work. Admittedly I was installing the framework from scratch…

So far so good, Gradle hasn’t thrown any errors, I’m installing the basic Gingerbread app now…

Oh snap! ConstraintLayout not supported on Gingerbread. Do I want to override this warning and install anyway (or use another layout, what did people use for Gingerbread back then?

Install anyway Gradle lets find out if I can get this thing to run. I love ConstraintLayout, most of my apps use it!

Ok nah, Android support v7 library has moved past the whole “Gingerbread” thing (AKA they DEPRECIATED it). Time to start again – I may need a new test project..

Support v4 library has minimum API 14, same as Support v7 library.

So far no luck compiling anything for my old phone with Android Studio.

Let’s Try Github

There’s loads of old code on Github, clone and install something from +5 years ago when Gingerbread was still supported?

OK success. I went and imported a project (https://github.com/andmatand/knitknit-gingerbread/) 44 commits, somebody put some time into this knitting tool for their girlfriend (it says so on the readme)

Then I had to specifically choose not to use the latest versions of libraries, add maven (all guided by Android Studio) and voilla. The thing installs.

This is pretty hit/miss. But as a proof of concept I will take it. I want to use my old phone for something, maybe as a streaming webcam, we used to use it as a baby monitor when my son was little. Now I can make my own apps for it.

Next up: Installing Ubuntu on my S3 mini (using PostmarketOS) and running some good old c – and is there any point in doing this if you can just install Termux?