Smart Poi

Making a living during the Corona virus outbreak..

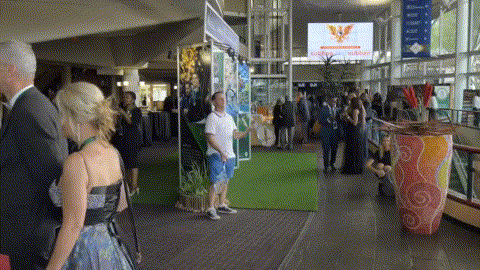
My whole country is in lockdown right now. As a professional circus performer I am particularly affected by the order to stay at home…

As of writing this post, my last paying function, a small birthday party show, was a week and a half ago. I initially started uploading some crazy stuff to YouTube in the hopes that somebody might notice and donate to my family:

Then my wife had a great idea, why not offer an online show. Skype or Whatsapp video is a bit unreliable, so we came up with the idea of a custom, personalised video for parties, available as an mp4 download. Here is the trailer for our offering:

We have already received some enquiries about this video, here’s hoping enough people want one to make a difference to our financial situation here. I am charging $11 (US) for the full 20-25 min custom show video which will be available as a private download from my server (DigitalOcean of course)

If you are interested in booking the show, please check out https://bigtop.co.za for more details.

Finally, I uploaded an entire show I did for an audience of one (my son) last week. For all the kids who are bored at home:

I am going to continue making video’s and practising for the duration of the lockdown here, as well as working on my new CoronavirusSA tracking android app and other projects.

What are you doing to keep busy in these trying times?

tomjuggler at gmail dot com to get in touch

Remember, stay safe and wash hands people!

postmarketOS first look

At home we have a bunch of old Android devices and laptops. The laptops all have some version of Linux running on them by now, but so far I have only had limited use for the oldest Android devices. I have an old S3 mini for example which has a great screen, but unfortunately LineageOS (the Android Upgrade) latest version available is Nougat, and that runs rather slowly. Besides, I already have two Android devices working with later versions.

PostmarketOS is a fairly new project with the goal of porting Alpine Linux (really small) with mainline kernel to ALL Android devices. Also you can run all types of UI on top of postmarketOS for example Plasma Mobile. I just wanted to see if I could have a device with WiFi which I could use to run some Bash scripts, c programs and possibly Python.

Here is how it works:

  1. You need a computer running linux – install the pmbootstrap program
  2. put phone into fastboot mode – making sure to follow instructions on postmarketOS wiki – S3 mini page was here
  3. after following the install guide (really comprehensive and simple), and choosing the kernel (mainline or the old one from Android), the Desktop (mate, xfce, plasma mobile, and many more), just run the install scripts
  4. ssh into phone via usb (or just use the phone touch screen)
  5. to install any program (from alpine linux) type apk add <program>
  6. a good one to have is corekeyboard (onscreen keyboard for phone)

So here it is then: Mate desktop running on postmarketOS in my S3 mini. (not mainline kernel though):

This is my phone screen now. The menu works and everything! (date and time no)

So far I have not been able to get WiFi working, or Bluetooth, however there is an option to share the laptop internet via USB, so I can still install programs. I installed gcc and compiled and ran a c program, and of course a shell script. This is really a great project and worth checking out if you have an old phone or two lying around.

Monkey Detector Circuit and App

It’s been a while since I was so excited about a project. After much struggle (to do with a very hot voltage regulator) I have come up with a working circuit for the hosepipe tap trigger.

I was hoping to power the whole thing from 12 volts but the voltage regulator was getting a bit hot, and my main directive for this whole project is to not spend any money (otherwise I would have a relay shield like this one instead of the bare 5v relay which I had to trigger with a transistor)…

The other exciting thing was the Android app. I decided to create a stand-alone app which recognizes monkeys to put on the play store. Right now it plays a loud siren sound when a monkey – or baboon – is detected. I can’t even count how many times it would have been useful to have a simple alert which would warn me about vervets attempting to break in on the other side of the house.

Don’t get me wrong, I love the monkeys. They are really interesting to watch, their kids play in our yard, they do tight-rope on the telephone wires, and the troupes have all-out warfare sometimes on the road. The other day we found out that our neighbor’s dog has a pact with the monkeys: they open the bin for him and he helps them eat the contents. Just some monkeys and a dog getting along just fine!

So the Android app is pending review, it’s called Monkey Detector, I will add a link to it when available. My third play store app!

Update: Monkey Detector on Google Play Store – unfortunately some devices are having a problem where the app isn’t playing the alert sound. I am looking into this (it works on my phone…)

Monkey Detector – image for app icon

Mobile Monkey Detector

It’s amazing how machine learning has improved over the last few years. I was dabbling with TensorFlow for a while, then moved on to look at pyCharm, but ultimately I was going to go with the easy-to-use Google image recognition API for the mobile version of my monkey detector.

Then a few days ago I stumbled upon fritz.ai and their even easier-to-use pre-trained mobile classifier. Unfortunately the example was written in Kotlin, but anyone developing an Android app today should know that, so I gave it a go. Here is the tutorial on Medium (with link to Kotlin code on GitHub) https://heartbeat.fritz.ai/image-labeling-on-android-in-kotlin-using-fritz-ai-and-camerax-1466089b2e34

The current version of the app (detects monkeys but doesn’t send a signal to my WiFi connected sprinkler system yet) is here: circusscientist.com/seeMonkey.apk – now available on the Google Play Store!
In order to use it you need to give camera permissions before first run, otherwise the app will force close. Just point it at a monkey and get alerted* (pictures of monkeys work fine)

*If you are wondering what happens, my 6 year old son shouts “Hey you, get away from my lunch!” when a monkey is detected.

The next step is to adapt my Arduino controlled tap valve (more on this to come soon) to receive WiFi (using ESP8266 of course) and then send the signal from the app (in Kotlin…!)

I can’t wait to make the demo video, those monkeys are trying to get into the bin (and our house) every day, and they hate getting squirted.

SmartPoi Code Dump!

2020 is the future! In the future I want to have many projects complete and be working on something new. So here is the everything I have been working on for the past few years, all in one go. Is this complete? You tell me!

I have uploaded the code to github, and some programs to my site, all is explained, although possibly in a rather rushed way.

Significant things which I have finally open-sourced (as promised) are the Android App (for streaming images and patterns to the poi), the full firmware for ESP8266, the circuit and PCB I used, CAD files for 3d printing and more.

Still to come is the code for uploading the backup images to the poi (an old windows .exe is available for now).

To read about how all of these programs work together check out the SmartPoi menu option above, which include the following 3 new pages:

  1. https://www.circusscientist.com/smart-poi-android-app/
    – description and code for android controller app
  2. https://www.circusscientist.com/smartpoi-full-circuit/
    – PCB, breadboard, parts and CAD files to make the hardware
  3. https://www.circusscientist.com/smartpoi-firmware/
    – ESP8266 code and description

If anyone is interested in making their own streaming poi all of the parts are linked.

Affiliate links are included on this website. Please support my future projects! Another way to support my work, and help yourself to free stuff at the same time, is to check out DigitalOcean with their promotional 2 months free hosting. If you haven’t yet heard of them, they are the best and cheapest virtual server on the market right now, use the link!

If you are trying to make the poi please consider signing up to the mailing list, I am emailing updates to quite a few interested parties right now. No spam, just updates. In the last two years there have been only four emails, so not a whole lot…

UPDATES:

Sign up for our update alerts:

Stripboard Sucks

I have been trying to make my poi easier for anyone to duplicate by eliminating the costly custom circuit board. So I tried to make it on stripboard, which was a disaster. Here is the idea:

And here is how it ends up looking on the stripboard (with tilt switch):

So that looks great and all but in practice, having to cut the stripboard and solder and everything else, there are too many possibilities for shorts and troubleshooting it was turning out to be a nightmare. There are 18 solder points on the board above, not to mention cutting the metal on the stripboard (under the esp-01)

Here is another idea, I am trying to make this simple, the D1 mini costs just $1 more and can run on 5v which is the right voltage for the LED strip anyway. This is the new circuit:

Now we have only 9 points to solder (not including the LED Strip, I didn’t include it above either).

I also re-imagined my poi outer shell, to give access to the usb programming port on the D1 Mini, so this will help with development as well.

Looking forward to putting this all together, and updating my tutorial series (if it all works as planned)

Smart Poi Upgrade

So, my Smart Poi are battery powered, of course. I chose AAA NIMH batteries in a pack of 4 for this originally as this provides around 5 volts of power for the LED strip, and I have a voltage regulator to turn that into 3.3 volts for the ESP8266. Originally I got the batteries with tags on and had them soldered together into a battery pack (by a pro) and added a jack input for the charger. Nothing lasts forever, and after almost two years of use I find my battery packs are degraded to the point that they don’t power the poi anymore.

The simple solution would be to get some more packs made and simply replace the old ones, however I have found myself in situations where the one hour (big poi) or two hours (small poi) is simply not enough time. While they are charging the poi are not earning me money, so the plan now is to take the same batteries and make them replaceable. I found a cheap spring loaded plastic battery holder which fits inside the poi housing, so a simple jtag connector (molex whatever you want to call it, I am getting the cheapest one) will give me hours more poi spinning time, which means more money of course!

In addition, I am going to be adding a tilt switch to the LED strip power line, so while the poi are held upside down the strip will be off, but the controller will still be on, and connected to the Android app. This will save power significantly during down time (walking from one area to another for example).

Simple improvements, but with a major impact on my performance.

Now to get onto improving the code I promised to release as open source! A hard task but it’s coming.

Progress with Monkey Detector

So I have been working on the vervet monkey detector idea for a little while now. So far I have had some success with the back end. Here is an update on how it works so far. (tldr I used Google Cloud Vision api and some bash scripts)

  • 1. I take a photo of the monkey (I still need to automate this, with motion detection)
  • 2. Upload to my server using scp
  • 3. Some moving around on the server to make the image public for Google Cloud Vision to see it – using inotifywait and mv
  • 4. Google cloud vision api call with image url using curl
  • 5. To do: parse json response from google to check if a monkey is actually there.
  • 6. Send a signal to wireless valve (switches on the sprinkler and hopefully gives the monkeys a fright) – I have built one already, just need to modify the code slightly for wireless. Thinking of using esp8266 for this, since I have so many lying around, and a 12v battery since the tap valve solenoid runs off of 12v. I have a nice circuit board I built for my wireless poi which incorporates an ESP-01 and a voltage regulator. Add in a relay to switch 12v and it’s done.

So there is much to do. There is also the question of accuracy, obviously I don’t want any false positives wetting any unwary visitors, so I need to test this a lot before using it. The first version will trigger an alarm only, which in itself could be useful as a phone app, for example. We might be able to leave the windows open on occasion, with a monkey detector to alert us when one tries to get in and steal our food (this happened twice in the last week)

At some point I will have to make my own machine learning classifier for monkey images, as Google charges $1.50 currently per 1000 images classified. The first 1000 are free, but they have a habit of changing the pricing on their products without notice.

Traffic Light with Button

Fritzing is a great open source project. It turns out that plugging wires into a breadboard is a great way for 5 year olds to develop hand-eye co-ordination, so I have started making some kid-friendly projects for my son.

The first was a traffic light project. This is conveniently located in the Fritzing examples, although you have to go to their website (link) to get the Arduino code. They use an Uno as controller, but I prefer the breadboard-friendly Nano. I didn’t have to make any modifications to this project for it to be fun, apart from using the Nano instead of the Uno in the screenshot, and adding a blue LED with a separate switch, as my son insisted on having his favorite colour represented.

This project offered multiple opportunities for learning. For one, it’s a working traffic light, so we went over the rules with some of his lego characters, look before you cross, press the button and wait, etc. Secondly I left the jumper wires to my son to plug into the board, and tried to explain a bit about DC current as well. We had fun turning the LED’s the wrong way, I just made sure the board wasn’t powered when he was busy plugging things in.

For power I used a power bank, plugged into the nano with USB. The power bank has two outputs, so we can have two projects powered at the same time. There are quite a few projects which are fun for kids, and since my kid loves “helping his dad” it’s going to be something I will be doing a lot in the future. More to come soon.